Script source code file: sample/overlay/main.lua
The goal of this tutorial is to show you
- how overlays work
- how to create overlays
createOverlay()
setOverlayColor()
renderOverlay()
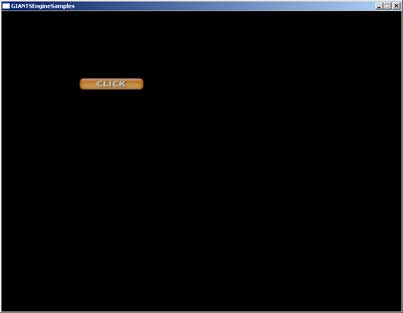
When you run sampleOverlay.exe you see an overlay displayed on the screen. If you click on it, its position changes randomly.
Open main.lua which is in /sample/overlay to take a look at the code.
First there are three variables: overlayId holds the id of the overlay, overlayX and overlayY are used to define the position of the overlay.
init()
In the first line, the variable overlayId is filled with the result of the function createOverlay which returns the id of the newly created overlay. The documentation describes the createOverlay functions as follows:
createOverlay
DescriptionCreate overlay objectDefinition
function createOverlay(string overlayName, string textureFilename)Arguments
string overlayName overlay name string textureFilename texture file name
Take note that you have to use the relative path to your file.
overlayId = createOverlay("overlay", "sample/overlay/overlay.png");
The second line consists of the setOverlayColor function.
Try to comment it out by adding -- in front of the line. Save the script and run the program. You see that this sample also works without the setOverlayColor function. It isn’t needed to display an overlay, but it gives you the possibility to change its appearance. Here is how it is described in the documentation:
setOverlayColor
DescriptionSet overlay colorDefinition
function setOverlayColor(integer overlayId, float red, float green, float blue, float alpha)Arguments
integer overlayId overlay id float red red value float green green value float blue blue value float alpha alpha value
The used arguments in the example result in white with an opacity of 0.75.
setOverlayColor(overlayId, 1, 1, 1, 0.75);
Try the arguments 1, 0, 0, 0.75, to see the difference.
mouseEvent()
This function runs every time you move the mouse or click on it. If the mouse is inactive this function isn’t executed. It provides the position of the cursor, and the state of the buttons which can be used within the function.
We first check, if the state of a mouse button is down, which is done by the isDown part of the if-construct. The rest of the if-construct is a simple hit test, it checks whether the cursor is within the overlay or not. If the if-construct returns true, you have clicked on the button. Then the overlayX and overlayY values are overwritten with a random number between 0.05 and 0.8.
function mouseEvent(posX, posY, isDown, isUp, button)
-- Check if overlay has been clicked
if isDown and posX > overlayX and posX < overlayX+0.16 and
posY > overlayY and posY < overlayY+0.04 then
overlayX = math.random(50, 800)/1000;
overlayY = math.random(50, 900)/1000;
end; end;
-- Check if overlay has been clicked
if isDown and posX > overlayX and posX < overlayX+0.16 and
posY > overlayY and posY < overlayY+0.04 then
overlayX = math.random(50, 800)/1000;
overlayY = math.random(50, 900)/1000;
end; end;
draw()
What happens here is essential : try commenting out the renderOverlay function once. If you run the sample now, nothing will be rendered at all. This function is needed to render an overlay. This allows you to display or hide components (e.g. menu options) depending on the state of your program.
Here is how the function is described in the documentation:
renderOverlay
DescriptionRender overlayDefinition
function renderOverlay(integer overlayId, float x1, float y1, float width, float height)Arguments
integer overlayId overlay id float x x position [0,1] float y y position [0,1] float width width [0,1] float height height [0,1]
A width and height of 1 means that the overlay has exactly the size of the screen.
Since overlayX and overlayY change when you click on the overlay, it is instantly rendered in the new position.
function draw()
-- Render overlay
renderOverlay(overlayId, overlayX, overlayY, 0.16, 0.04);
end;
-- Render overlay
renderOverlay(overlayId, overlayX, overlayY, 0.16, 0.04);
end;